How to Change Opacity in Google Slides
Whether you’re fading a background photo, softening a shape for an overlay, or building a watermark, adjusting opacity is one of the fastest ways to make a slide look more polished. The tricky part is that Google Slides doesn’t have one single opacity control — the transparency setting lives in a different menu depending on whether you’re working with a shape, an image, or text.
This guide covers how to change opacity in Google Slides for every object type, including the most-searched case: changing the opacity of a shape.
Quick Answer: Format Options and the Transparency Slider
Google Slides calls its opacity control “Transparency,” and it lives inside Format options:
- Select the shape, image, or line you want to adjust.
- Click Format options in the toolbar, or right-click the object and choose it from the menu.
- In the panel on the right, find the Transparency slider (under Fill for shapes, or Adjustments for images).
- Drag the slider left or right to increase or decrease opacity.
Below is the full walkthrough for each object type, since the menu location changes slightly depending on what you’ve selected.
How to Change the Opacity of a Shape in Google Slides
This is the most common transparency task in Slides — fading a rectangle, circle, or line so it works as a soft overlay, background panel, or highlight. Here’s how to change the opacity of a shape:
- Insert or select the shape you want to make transparent.
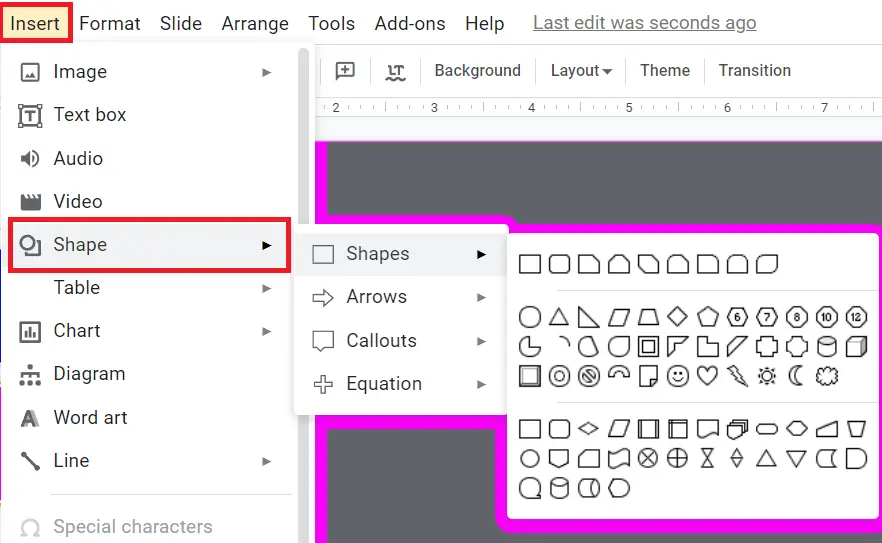
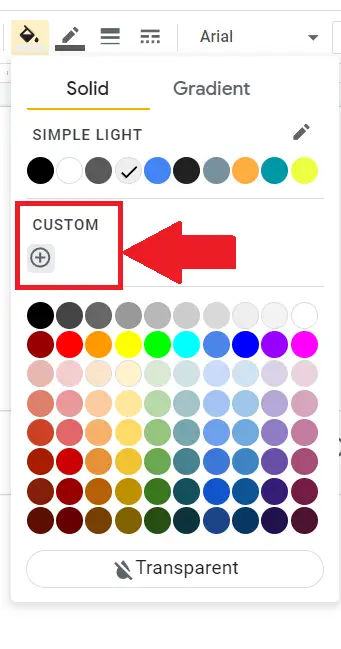
- Click the Fill color icon (the paint bucket) in the toolbar.
- Click Custom at the bottom of the color picker.
- In the custom color window, drag the Transparency slider — this is the same control some users look for under “format options transparency slider.”
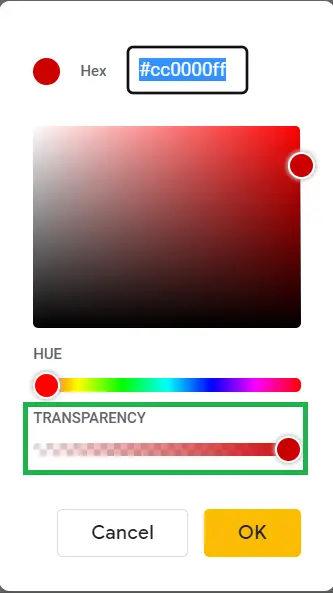
- Click OK to apply.
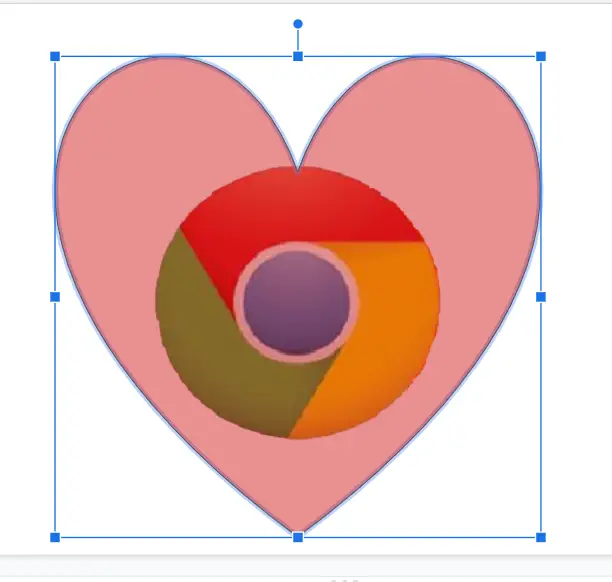
A few ways this gets used in practice:
- Overlay panels: place a black or dark shape at roughly 40–60% opacity over a photo so white text stays readable on top.
- Soft highlights: reduce a shape’s opacity to 10–20% and place it behind text to create a subtle highlight effect without covering the words.
- Transparent shape outlines: if you only want the border visible, set the fill to fully transparent (drag the slider all the way) and keep the border color solid.
If you’re trying to reduce shape opacity and don’t see the Transparency slider, make sure you clicked Custom in the fill color picker — the slider only appears in the custom color window, not the default swatches.
How to Change the Opacity of an Image in Google Slides
- Click the image to select it.
- Click Format options in the toolbar (or right-click the image and choose it).
- In the side panel, expand Adjustments.
- Drag the Transparency slider to fade the image in or out. The preview updates live.
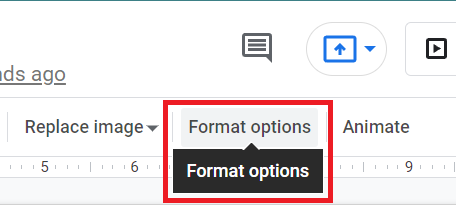
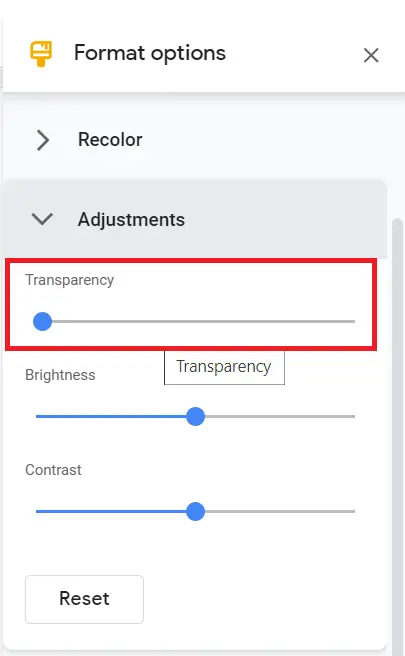
This is what most people mean by “google slides format options transparency image” — it’s the same panel used for brightness and contrast, just further down the list.
How to Make Text Transparent in Google Slides
Regular text boxes don’t have a transparency slider — Slides only exposes opacity controls for fills, not for typed text directly. There are two workarounds:
Option 1: Lighten the text color. Select the text, open the Text color tool, choose Custom, and pick a lighter shade or reduce the alpha value if your color picker shows one. This mimics reduced opacity without a true transparency setting.
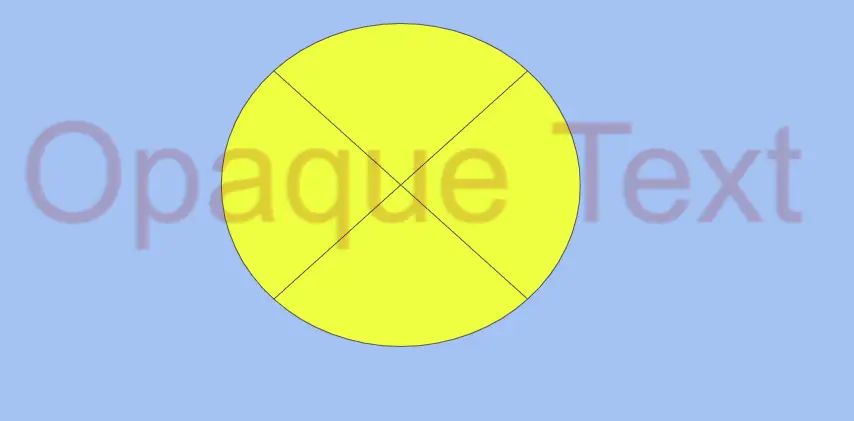
Option 2: Use Word Art. Insert your text via Insert > Word Art instead of a regular text box. Word Art is treated like a shape, so it gets the same Fill color > Custom > Transparency slider described above — this gives you real, adjustable text opacity, which a standard text box can’t do.
How to Add a Transparent Background or Watermark
To fade a logo or add a “DRAFT”-style watermark:
- Insert your logo or text (Word Art works well here) and position it on the slide.
- Reduce its opacity to around 10–20% using the methods above.
- Right-click it, choose Order, then Send to back, so it sits behind your other content.
Fixing Common Transparency Problems
Can’t find the transparency option at all? Make sure the object is selected first — Format options and the fill color picker only appear once something is clicked. If you’re on the mobile app, note that Slides for Android/iOS has fewer formatting controls than the browser version; for full control over transparency, use a desktop or laptop.
Slider only goes to a certain point? Some objects have a locked minimum transparency depending on their fill type (solid vs. gradient vs. image fill) — try switching to a solid custom color first, then adjust transparency.
Changes not saving? Make sure you click OK or click outside the panel after dragging the slider; closing the tab mid-edit can revert the change.
Frequently Asked Questions
Can you change opacity in Google Slides?
Yes. Google Slides calls it “Transparency” rather than “Opacity,” but the effect is the same — you’ll find the slider in Format options for images, or in the custom fill color picker for shapes and Word Art.
How do I lower or reduce opacity in Google Slides?
Select the object, open the transparency slider (via Format options for images, or Fill color > Custom for shapes), and drag it toward the higher-transparency end to lower the opacity.
Does Google Slides have an opacity setting like PowerPoint?
Yes — it’s labeled “Transparency” instead of “Opacity,” and instead of one universal slider, it’s split between Format options (images) and the custom fill color picker (shapes and Word Art).
Can I adjust transparency on the Google Slides mobile app?
Only partially. The mobile app has fewer formatting tools than the browser version, so for reliable transparency control, use Google Slides on a computer.
Final Thoughts
Once you know where to look, changing opacity in Google Slides — for a shape, an image, or even text via Word Art — takes just a few clicks. The shape method (Fill color > Custom > Transparency) is worth remembering on its own, since it’s the one most people end up needing for overlays, highlights, and watermark effects.