How to Insert Shapes in Google Docs (Step by Step)
Google Docs doesn’t have a dedicated shapes button sitting on the toolbar, which is why so many people can’t find it at first. To insert shapes in Google Docs, you actually go through the built-in Drawing tool — and once you know where to look, adding circles, rectangles, arrows, callouts, or custom shapes only takes a few clicks.
This guide covers how to add a shape, add text inside it, change its color and size, edit it later, and even add 3D shapes that Google Docs doesn’t build in by default.
Quick Answer: How to Insert Shapes in Google Docs
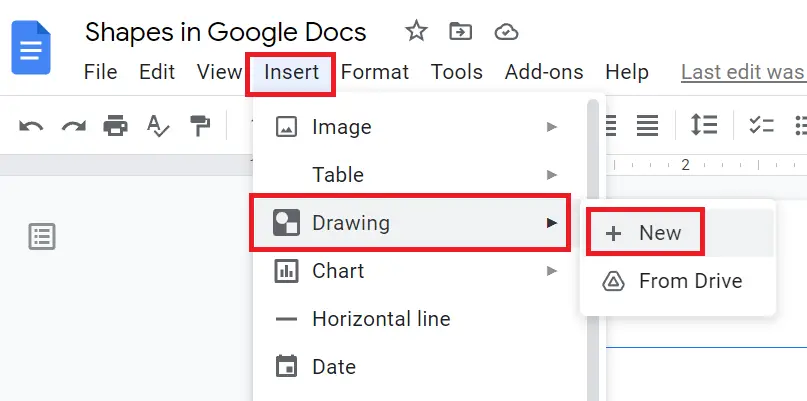
- Click Insert in the menu bar.
- Go to Drawing > New.
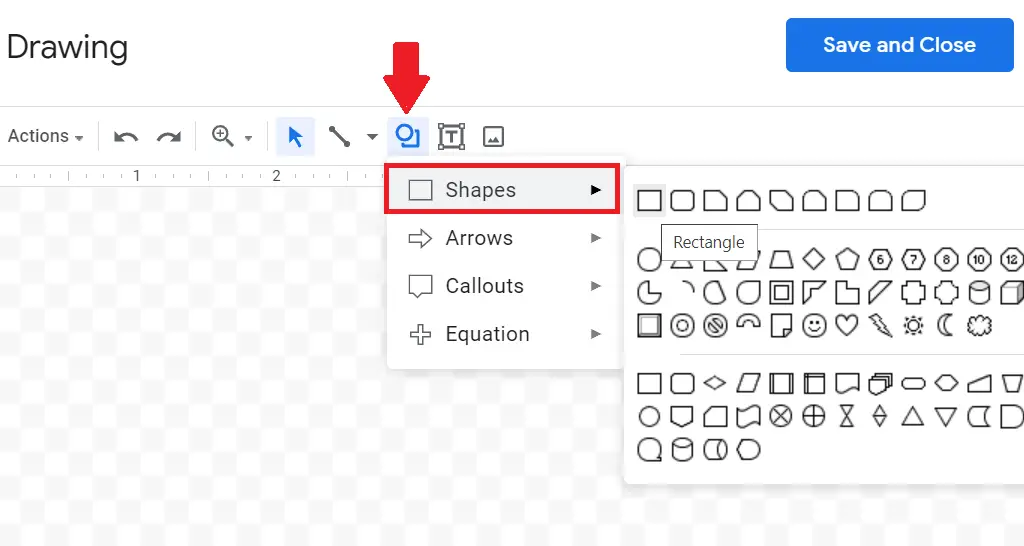
- Click the Shapes icon in the drawing toolbar.
- Pick a shape, then click and drag on the canvas to draw it.
- Click Save and Close to insert it into your document.
The full walkthrough below covers each step in more detail, plus how to style and edit shapes after they’re added.
How to Add a Shape in Google Docs (Step by Step)
- Open your document in Google Docs and click where you want the shape to appear.
- Click Insert in the top menu.
- Hover over Drawing, then click New.
- In the drawing window that opens, click the Shapes icon (it looks like a circle overlapping a square) in the toolbar.
- Choose a category — Shapes, Arrows, Callouts, or Equation — then select the specific shape you want.
- Click and drag anywhere on the canvas to draw the shape at the size you want. For example, selecting the oval icon and dragging lets you make a circle in Google Docs.
- Click Save and Close in the top-right of the drawing window.
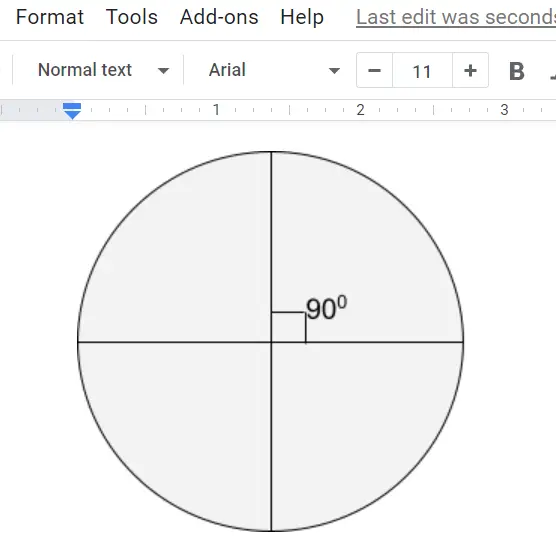
The shape now appears in your document as an image. You can click it at any time to move it, resize it by dragging the corner handles, or double-click it to reopen the drawing editor and make changes.
How to Add Text Inside a Shape in Google Docs
Shapes in Google Docs can hold their own text, which is useful for labels, callouts, or simple diagrams:
- Double-click the shape to open it in the drawing editor (or select it and click Insert > Drawing > Edit from the toolbar if it’s already selected).
- Double-click directly on the shape itself.
- Type your text — it will center itself inside the shape automatically.
- Click Save and Close to update the shape in your document.
If you’d rather keep the text separate and more freely positioned on top of the shape, you can also insert a text box over the shape instead and type into that.
2D vs. 3D Shapes in Google Docs
Google Docs’ Drawing tool covers 2D shapes well — circles, rectangles, speech bubbles, callouts, and arrows are all built in. 3D is more limited: only a handful of basic 3D shapes, like a cube and a cuboid, are available directly in the shape list.
If you need a 3D shape that isn’t in that short list — a pyramid or cylinder, for example — the workaround is to create it outside Google Docs and insert it as an image instead. On Windows, the built-in Paint 3D app works well for this: build the shape there, export it as an image, then use Insert > Image to add it to your document.
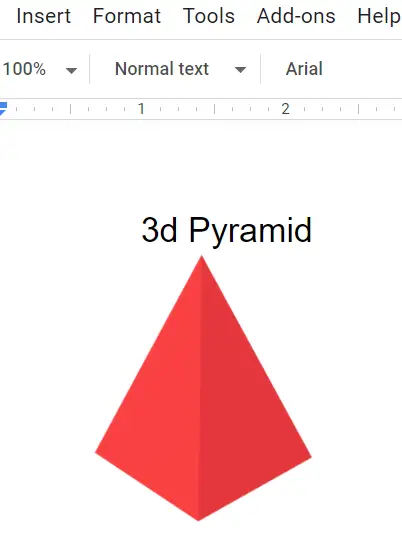
Once it’s inserted as an image, you can still adjust its color and transparency, resize it, and change its text wrapping just like a native shape. For more advanced graphics beyond what Paint 3D or the Drawing tool can do, a dedicated design tool like Canva is worth a look.
How to Change Shape Color, Size, and Border
Once a shape is drawn, you can style it before saving:
- Fill color: Select the shape, then click the paint bucket icon in the drawing toolbar and choose a color.
- Border color and thickness: Use the border color icon (a pencil outline) and the border weight dropdown next to it.
- Resize: Click and drag any of the square handles at the corners or edges of the shape.
- Rotate: Drag the round handle above the shape to rotate it freely.
All of these options are available both while first drawing the shape and later when you reopen it for editing.
How to Edit a Shape After Inserting It
If you need to change a shape after it’s already in your document:
- Click the shape once to select it.
- Click Edit in the small toolbar that appears above it (or double-click the shape directly).
- Make your changes in the drawing editor — color, size, added text, or additional shapes.
- Click Save and Close to apply the changes.
How to Move a Shape Freely Around the Page
By default, a shape inserted into Google Docs is treated like an inline image, which can make it awkward to position exactly where you want. To move it freely:
- Click the shape to select it.
- Click the small text wrapping icon that appears just below it.
- Choose “Wrap text” or “Break text” instead of “In line.”
With wrap text enabled, you can drag the shape anywhere on the page, and your document text will flow around it rather than getting pushed out of place.
Can You Insert Multiple Shapes or Combine Them?
Yes. You can add several shapes inside the same drawing canvas before saving — useful for building a simple flowchart or diagram. Open a new drawing (Insert > Drawing > New), add each shape one at a time, use the line and arrow tools to connect them, and click Save and Close once. All the shapes will be inserted together as a single image, which keeps their positions locked relative to each other.
Inserting Shapes in Google Sheets and Slides
The process is nearly identical in Google’s other Workspace apps:
- Google Sheets: Click Insert > Drawing, then follow the same steps as in Docs.
- Google Slides: Slides has a dedicated Shape icon directly on the toolbar — no need to go through the Drawing tool at all.
Where do I find shapes in Google Docs?
Go to Insert > Drawing > New. Inside the drawing window, click the Shapes icon in the toolbar to see categories like Shapes, Arrows, Callouts, and Equation.
Final Thoughts
The Drawing tool isn’t the most obvious place to look for shapes in Google Docs, but once you know it’s there, it gives you more flexibility than a simple shapes button would — you can combine multiple shapes, add text, arrows, and lines, and edit the whole thing as one drawing whenever you need to make a change. If you’re building anything more complex than a single shape, sketching it out in one drawing session before saving will keep everything aligned.