To make a document presentation more friendly, attractive, and formal. You can add images, font style, bullet points, an arrow which is important. Text Box is also one of them.
Text Boxes may be of different shapes like rectangles, oval, rounded rectangle, etc. Here we will see how to insert text box in Google Docs of different shapes, customization, and how to delete boxes in Google Docs.
Simple and best ways for insertion and deletion of boxes in Google Docs via Normal Text Box and with help of Shapes (drawing tool) step-by-step.
How to Insert Text Box in Google Docs
Open your Google Docs document.
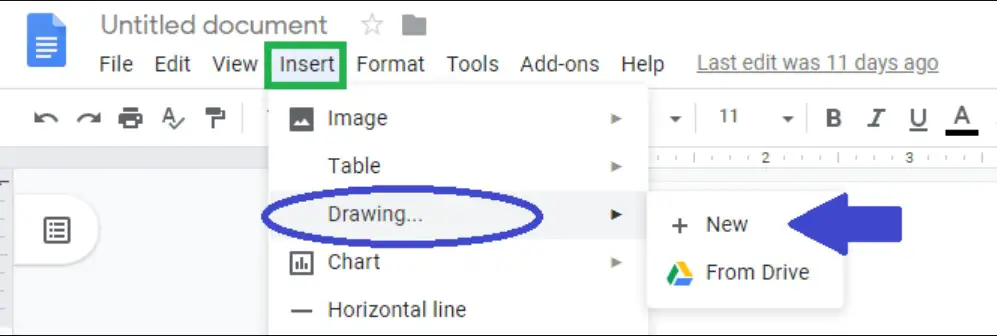
In the “Menu Bar” click “Insert” and then select “Drawing”.
You will see “+New” and “From Drive”. Click on “+New”. A Drawing Panel will open. As shown in below image.
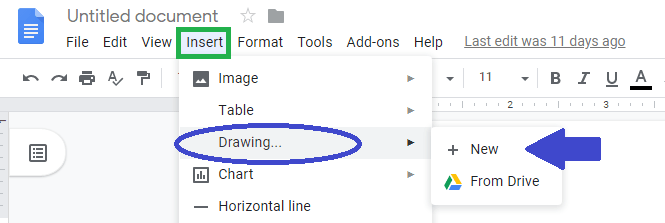
In the drawing editor, click on the “Text box” icon in the toolbar
Click and drag on the canvas to create the desired size for your text box.
Resize the text box by clicking and holding one of the corners, then dragging it up or down diagonally.
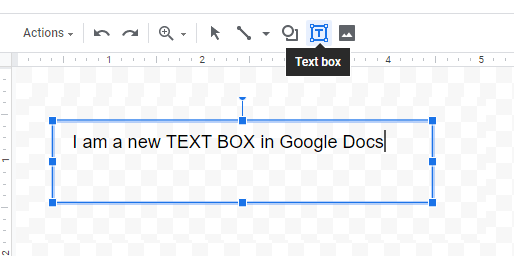
Once you have inserted the text box in Google Docs you can start inserting text by simply clicking inside the box and typing.
Customizing Text Boxes in Google Docs
You have learned how to insert text boxes in Google Docs, you can customize its appearance to make it more visually appealing.
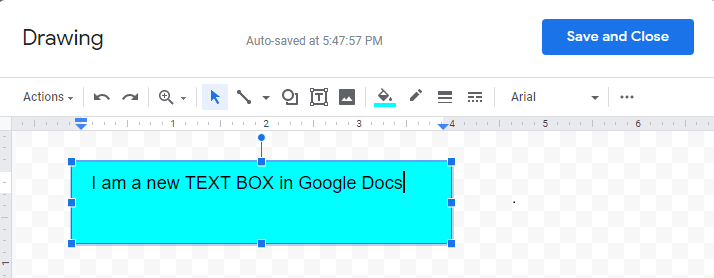
- With the text box selected, click on the three vertical dots in the toolbar to access the formatting options.
- From the menu that appears, you can change the text color, box background color, font style, font size, alignment, and other formatting settings.
- Experiment with different formatting options to create a text box that suits your document’s style and purpose.
- Once you are satisfied with the customization, click outside the text box to save the changes.
Moving and Resizing Text Boxes in Google Docs
Google Docs allows you to easily resize and move text boxes to fit in the Google Docs.
You can adjust boxes in Google Docs to where you want to place them by just dragging and dropping them. You can now change how to Wrap text, In line, or Break text.
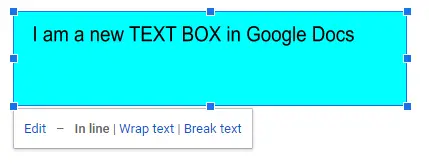
For adding some other text to the existing box, you just have to click the edit button on the box.
Using Shapes to insert text box in Google Docs
With the help of shapes and figures, you can insert different text boxes in Google Docs like square, oval, rounded rectangle, etc. Follow the below steps-
To create a box go to “Menu Bar” click “Insert” and then Go to the “Drawing” option and click it.
You will see “+ New” and “From Drive”. Click on “+ New”. It will open a new window called Drawing Panel. As shown below image.
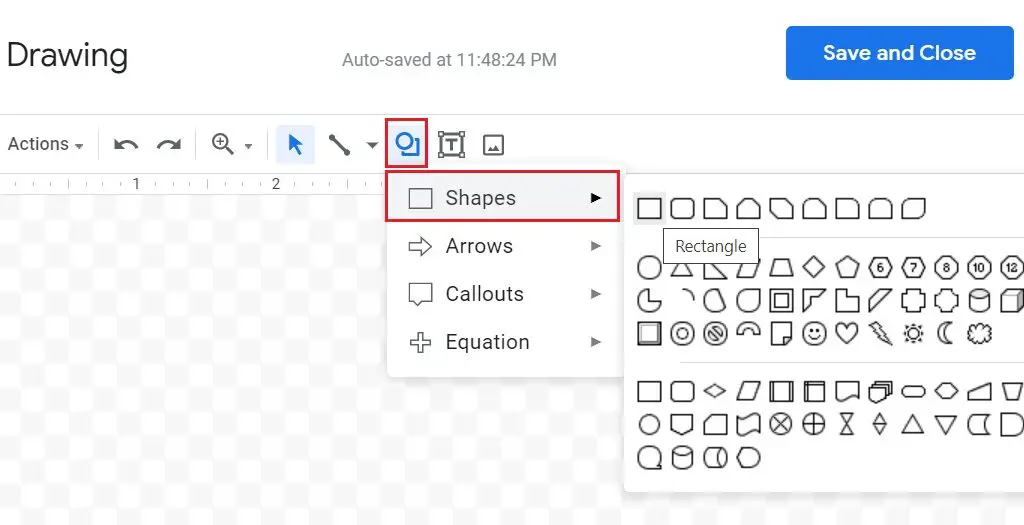
Click on the “Shape” icon from the toolbar, you’ll see Shapes, Arrows, Callouts, and Equation on the drawing window.
Go to “Shapes” and select the types of the box which you want to add in Google Docs from a variety of shapes.
Click and drag your mouse on the canvas to create the shape for your text box.
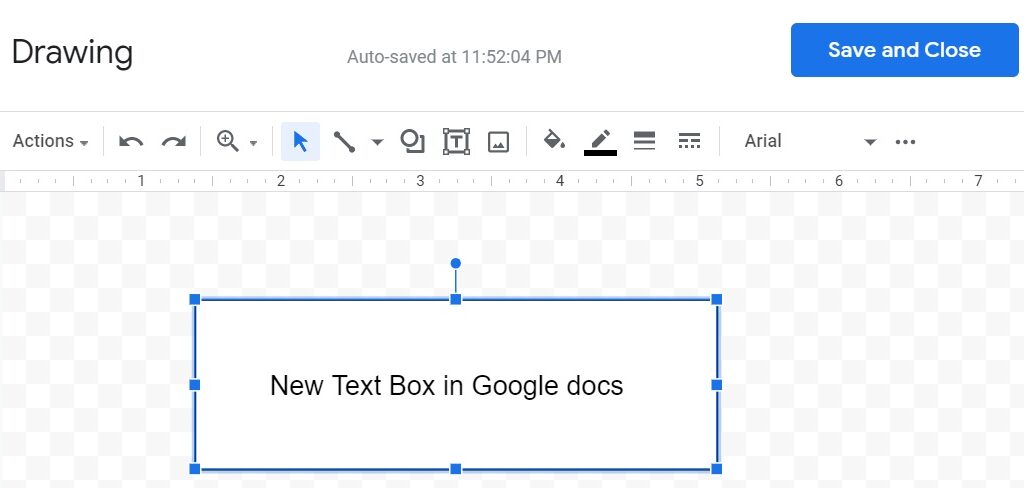
“Double-click” inside the shape to start typing and add text to the box.
Customize the text box’s appearance using the formatting options available in the toolbar.
Save and close the Drawing Panel to add the text box to your Google Docs document.
How to delete boxes in Google Docs
For the deletion of the boxes, there is no big task. Sometimes when the text box is of no use or looks ugly then we should delete it.
To delete a text box in Google Docs simply click the existing text box with the mouse and press either the “Delete” button from the keyboard or “Backspace”. That’s it.
There is also an option that you can insert text box over image, which can be helpful for you.

