How to Do Hanging Indent on Google Docs: Step-by-Step Guide
How to do hanging indent on Google Docs is a common question for students, writers, and professionals formatting documents.
A hanging indent is a paragraph style where the first line stays at the margin, and all subsequent lines are indented. This makes bibliographies, reference lists, and professional documents more readable and visually organized.
Google Docs provides multiple ways to put a hanging paragraph by either selecting and highlight the text or by pre-select the option before creating the document.
How to do hanging indent on Google Docs? You can easily create hanging indent on Google Docs by Google Docs hanging indent shortcut, from the Menu bar option, and by Google Docs ruler.
How to Do Hanging Indent on Google Docs (Menu Option)
With the help of the Menu option, you can easily create a hanging indent on Google Docs. This method will help you when the document is already created. Follow the below steps to create a hanging indent on Google Docs.
Open “Google Docs” on your desktop computer and create a new document.
Now select and highlight the text that you want to format with a hanging indent. This can be a single paragraph or multiple paragraphs.
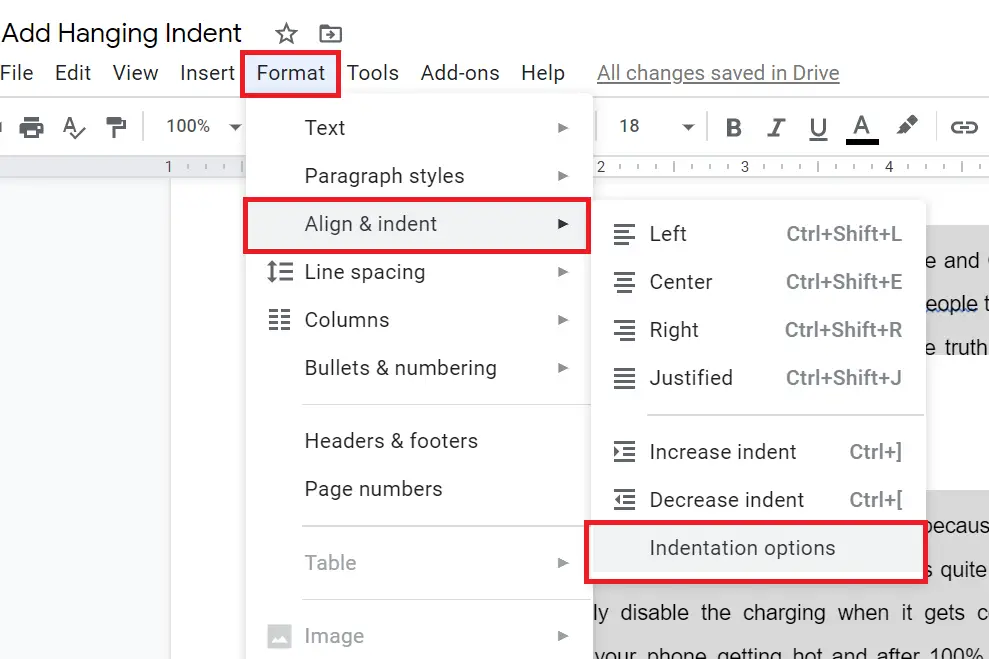
In the Menu bar, click on the “Format” option, then select “Align & indent” and choose “Indentation Options” section.

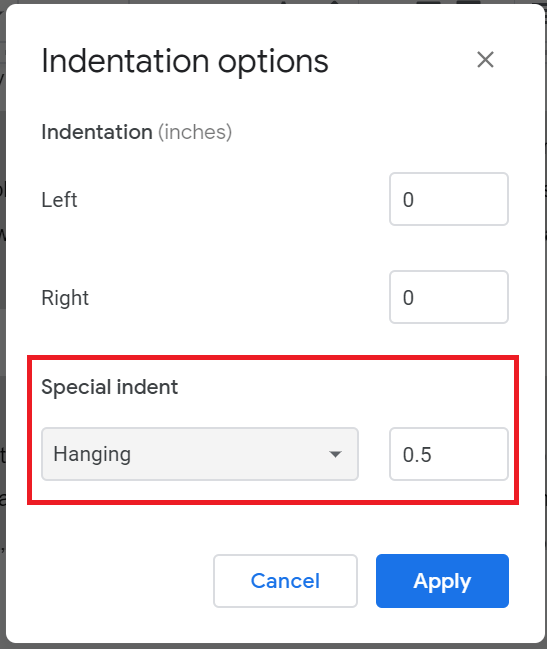
A small dialog box of Indentation options will appeas in front of you.
In the “Special indent” dropdown menu, select “Hanging“.
Adjust the “Hanging indent” slider to the desired distance. The distance is measured in inches, so if you want the second and subsequent lines of your paragraph to be indented 0.5 inches, move the slider to “0.5”.
Click on “Apply” to apply the hanging indent to your selected text. As shown in the below image-

An image of hanging indent example is just below which is done in Google Docs.

How to Do a Hanging Indent Using the Google Docs Ruler
With the help of Google Docs Ruler you can also create hanging indent in Google Docs.
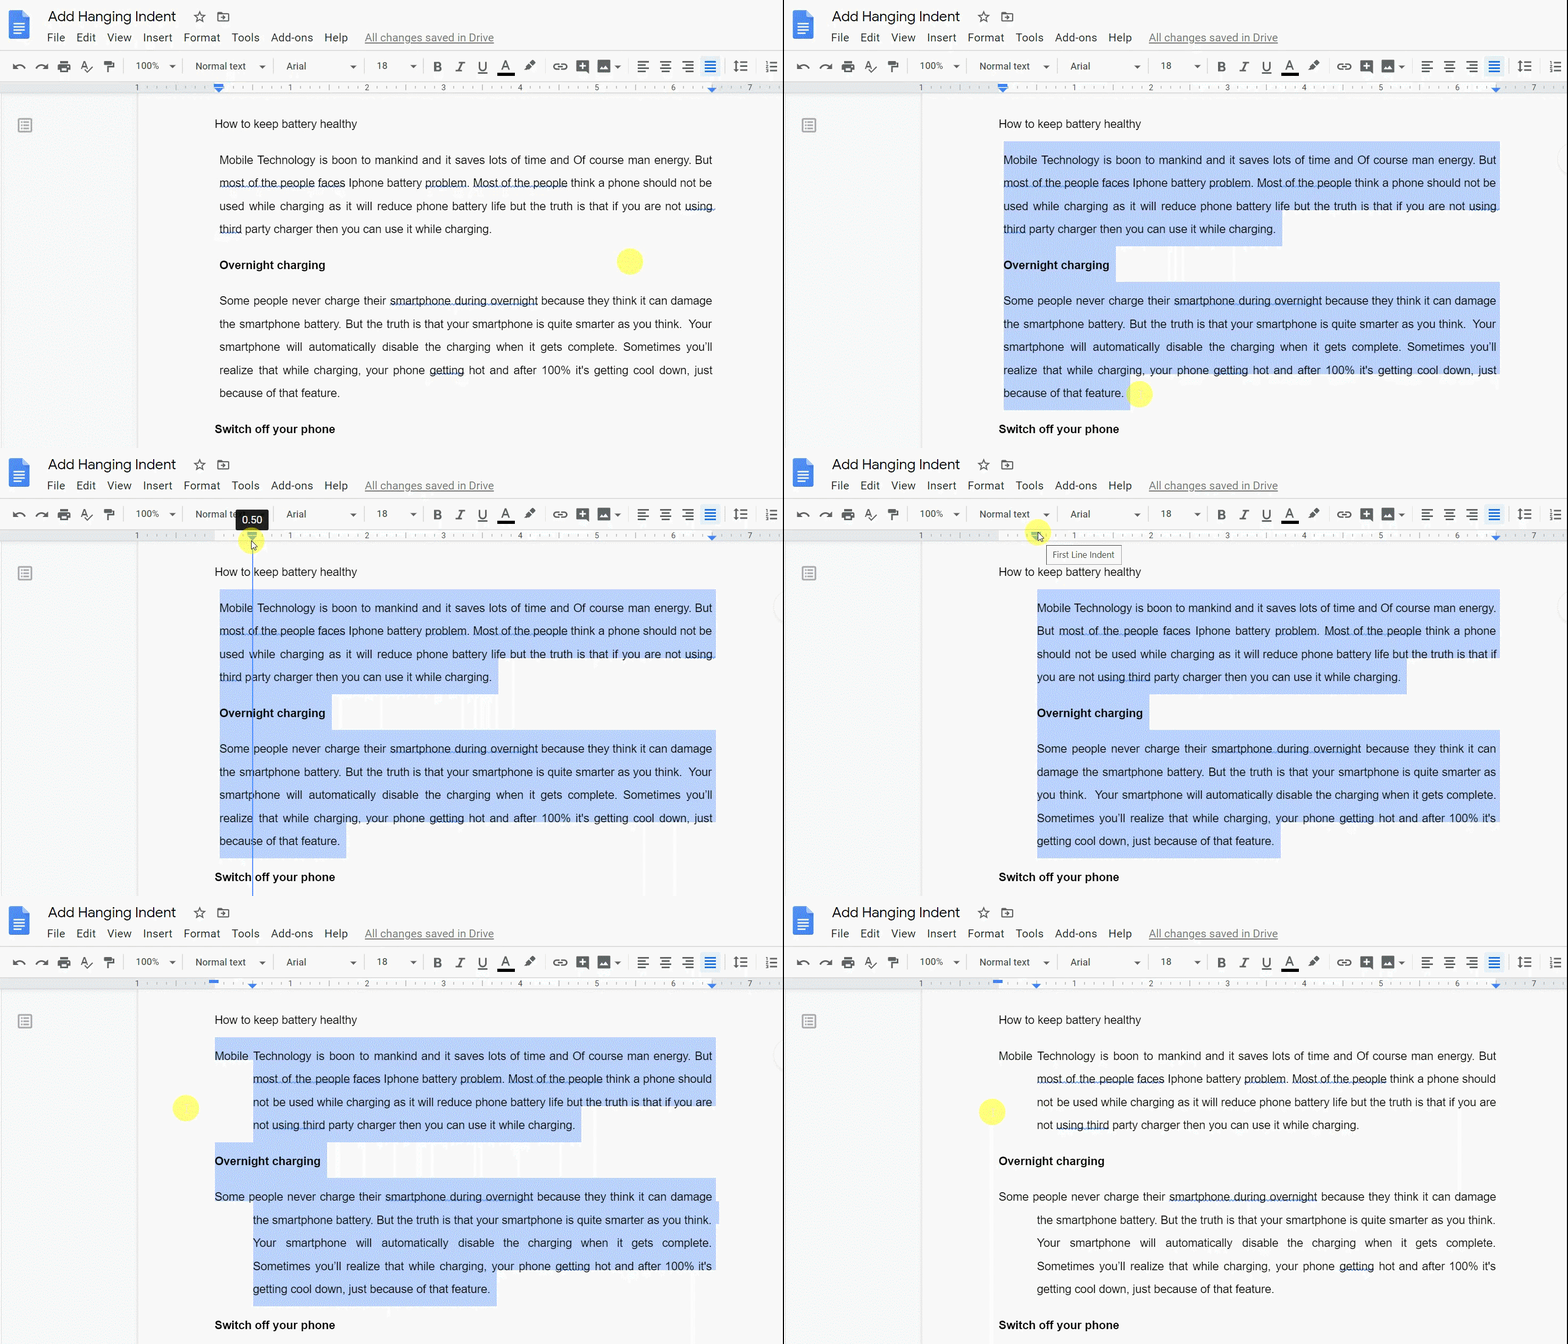
- Open a Google Docs document and highlight the text you want to indent.
- Click on the “Ruler” icon at the top of the page. If the ruler is not visible, go to “View” on the top menu and select “Show ruler.”
- Click and drag the left indent (small down arrow) to the right the desired distance, for example, 0.5 (half an inch).
- Click and drag the First line indent (small rectangle) back to the starting position. See the below image for how it can be done.

Google Docs Hanging Indent Shortcut
Instead of using a ruler Google Docs allows you to indent paragraphs. From the toolbar, you can select the decrease indent or increase indent option to create a hanging indent.

Alternatively, you can use shortcuts to indent paragraphs “Ctrl + [” shortcut to decrease indent and “Ctrl + ]” shortcut to increase indent.
How to Indent First Line on Google Docs
Indenting the first line of a paragraph can be helpful in creating professional-looking documents, such as essays or reports. To indent first line of a paragraph on Google Docs, the Google Docs ruler is the simple and easiest way to do it.
- Make the ruler visible by going to the “Menu bar”, clicking on the “View” option, and selecting “Show ruler”.
- Select the whole paragraph in which you want to indent the first line.
- Click and drag the First line Indent (small rectangle) on the ruler to the right side position where you want the first line to start.
From the above steps, you can create a hanging indent on Google Docs.
Tips for Perfect Hanging Indents
- Standard indent size: 0.5 inches for MLA or APA.
- Use the ruler for precise control.
- Highlight multiple paragraphs to apply the indent consistently.
- For mobile, use the Google Docs app formatting options to apply hanging indents.
- Combine with line spacing adjustments for better readability.
Conclusion
Creating a hanging indent in Google Docs is simple and improves the professional appearance of your documents. Whether you use the Menu bar, ruler, or keyboard shortcuts, these methods ensure your citations, bibliographies, and reports are properly formatted.