How to Add Caption to Image in Google Docs
Google Docs image caption is a small piece of text or word under a photo that gives information about an image that you will use in Google Docs also known as a subtitle.
In Google Docs, you can do figure numbering, add table caption and add text to image, but there is no built-in feature to caption images directly.
Then, how to add caption to image in Google Docs. There are some tactics that you can use to solve your problem and add captions on images and tables.
There are 3 Ways to add image caption in Google Docs. You can add photo caption by using Inline text, Add-on, by using Drawing, and by Table in Google Docs.
Inline Text to caption an image in Google Docs
First, we will use the “Inline text option” to add captions to images. Inline text on an image helps to write a small description of a particular picture.
Open “Google Docs” document on your desktop computer > upload your images > click an image in which you want to insert a caption in Google Docs.
Now select In line option under the image as shown in the below image and write your captions to the photo.
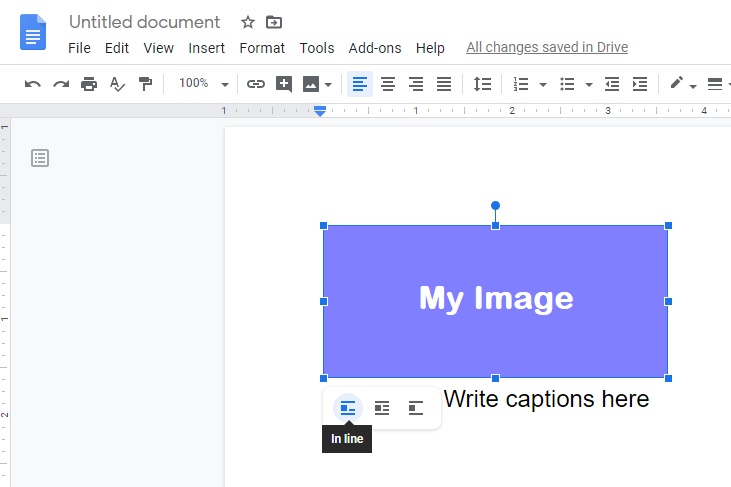
If you have more than two figures then you have to manually numbering the figures in Google Docs.
How to add image caption Google Docs using Add-on
There is an add-on name as Caption Maker. You can install a caption maker and add image caption in Google Docs. This tool helps you to create and add captions for images, drawings captions, add a caption to tables and figure numbering.
How to caption an image in Google Docs using drawing tool
You can add image caption in Google Docs with the help of a drawing tool. For that create a text box in Google docs document, then you can add a caption under the center of the image. Follow below instructions
In the “Menu” bar click on “Insert” then navigate to Drawing and then click + New
A “drawing panel” will open in front of you. Click the “Image button” icon and upload your image from a computer in Google Docs. You will also get other options to insert images like Upload, By URL, Google Drive, Albums.
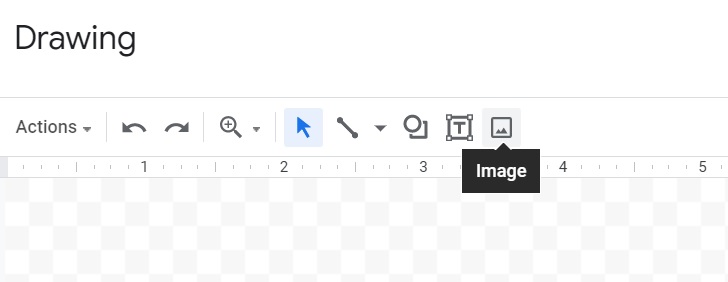
After inserting the image, click the “Text box button” which looks like T from the toolbar menu.
Then Draw the text box under the image and type your caption or create subhead text there as shown in the below screenshot.
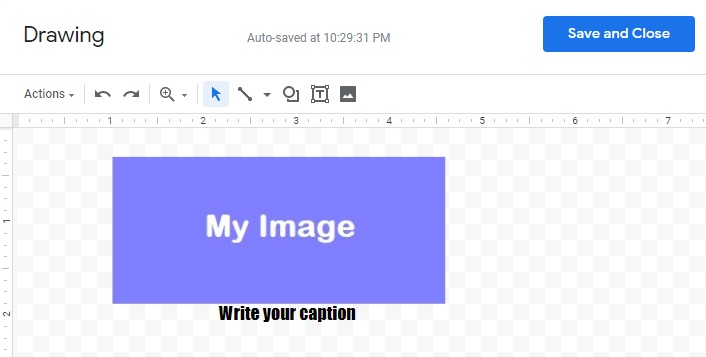
From there you can also adjust the font size, background color, make the text bold, italic so that when you add a caption to image in Google Docs it should be noticeable.
After the customization, you have to click on Save and Close button. Then your image with a caption will appear on Google Docs.
How to add description to image in Google Docs
Here we will use the Table format for adding a caption. Tables are generally used for making rows and columns in the document. Here we will use it to label the pictures.
In the Menu bar click on Insert navigate to Table and select 1×2 grid size. Now you have two cells, one for image and the second for captioning.
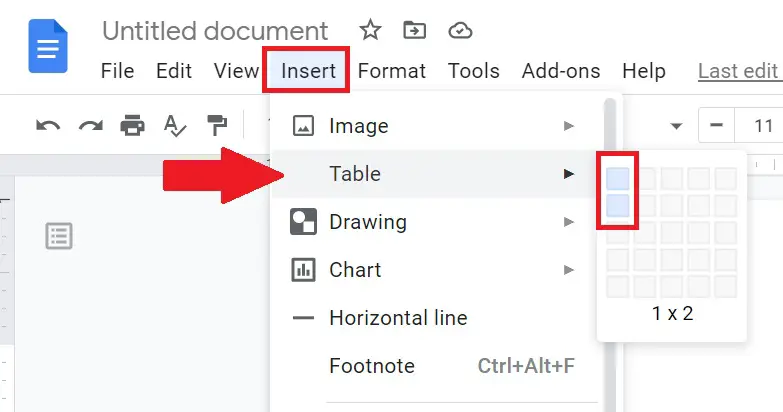
Insert a photo in Google Docs in the first cell of the table from the computer or if you already have a photo in the document then simply drag n drop in the first cell. See the below figure for reference-
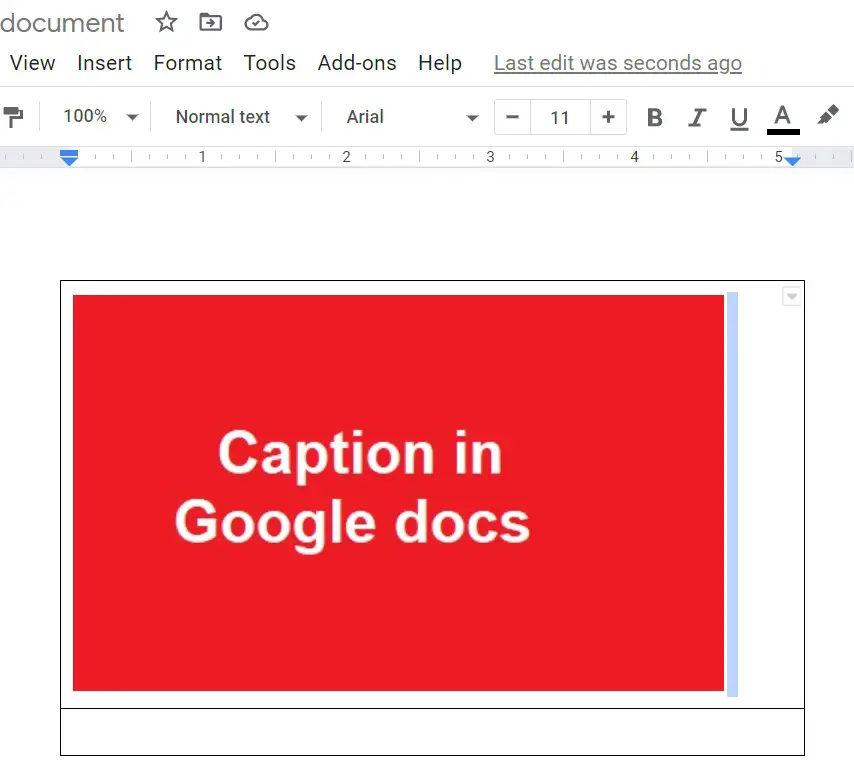
Now adjust the table border of the cell according to the picture you have uploaded in the document and in the second cell add image description that you want to use in Google Docs.
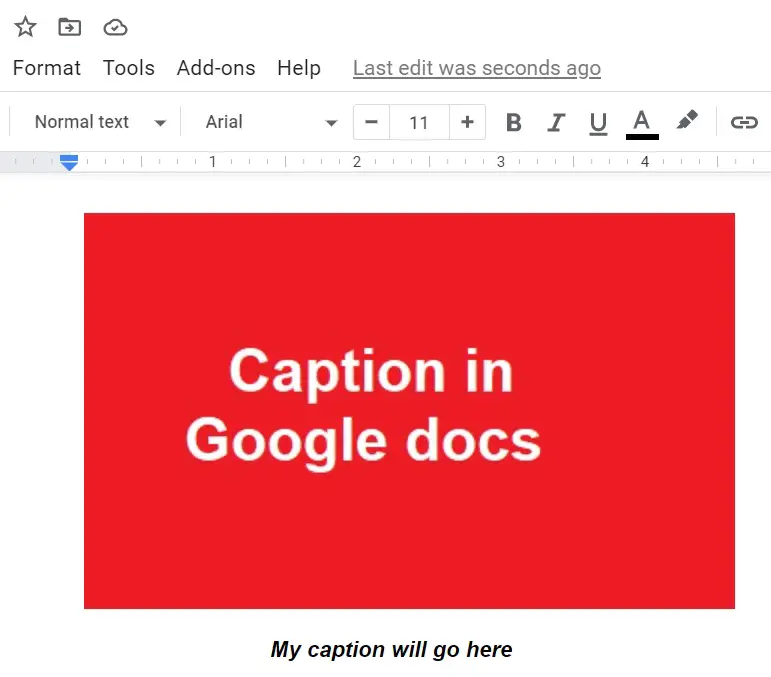
Google Docs table caption
You can add captions to table in Google Docs via Caption Maker add-on, which is a great tool for not only display figure numbering but also for adding captions to the table. You will get the option for placement of caption Above or Below, for Formatting and for Numbering, etc.
Your material is incredibly significant.
Sustain the incredible job !! Lovin’ it!