How to Show and Use the Ruler in Google Docs (Horizontal & Vertical)
When formatting documents in Google Docs, the ruler is one of the most useful tools — but many users can’t find it right away. If you’ve searched for “how to show ruler in Google Docs” or “where is the ruler in Google Docs”, you’re not alone.
When you want to print a page, you may need to adjust margins so that your content stays aligned.
With the Google Docs ruler, you can easily adjust left and right margins, set indents, and even use the vertical ruler in Google Docs to manage top and bottom spacing.
This guide explains everything you need to know: how to show ruler in Google Docs, how to use the Google Docs vertical ruler, and how to fix issues when the ruler in Google Docs is not showing.
How to Show the Ruler in Google Docs
By default, the ruler in Google Docs sits at the top of your document. If you don’t see it:
- Open Google Docs on your computer
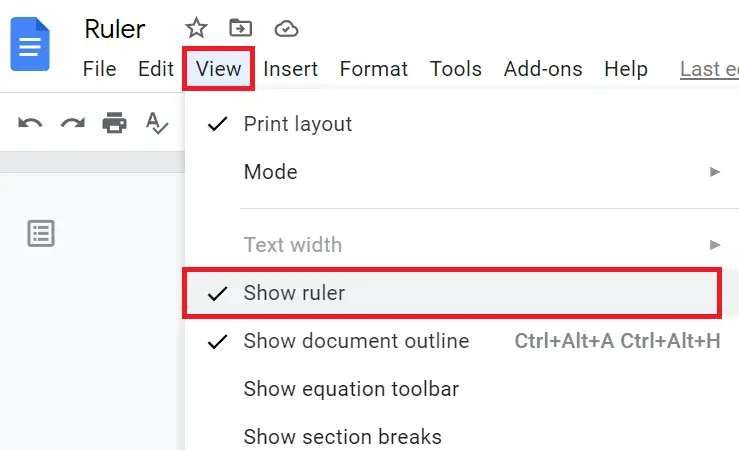
- From the “Menu bar” click on the “View” option then
- Navigate and click on “Show Ruler” Once you click on “Show ruler,” a horizontal ruler will appear at the top of your document.

How to Show the Vertical Ruler in Google Docs
In addition to the horizontal ruler, you can enable the side ruler in Google Docs (vertical ruler). This helps you adjust top and bottom margins.
To enable it:
- Go to View > Show ruler.
- Make sure View > Print layout is turned on.
Once enabled, the vertical ruler will appear on the left edge of your document.
Google Docs Ruler Settings
The Google Docs ruler settings control how the ruler behaves and what units it uses.
- Change ruler units: Go to File > Settings > Units and switch between inches and centimeters.
- Reset ruler settings: Drag indent markers back to the far left to restore default formatting.
- Adjust margins with the ruler: Use the top ruler for left/right margins and the vertical ruler for top/bottom.
- Fine-tune indents: Move the small blue markers to set first-line, hanging, or paragraph indents.
How to Use the Ruler in Google Docs
Once the ruler on Google Docs is visible, you can use it to fine-tune the layout of your document. The ruler lets you adjust margins, indents, and tab stops with just a drag of the mouse.
- Adjust page width (horizontal ruler):
Hover your cursor over the left or right margin markers on the top ruler until it changes into a double-sided arrow. Click and drag to increase or decrease the width of your content. - Adjust page height (vertical ruler):
Use the vertical ruler to drag and adjust top and bottom margins. - Set indents:
- First-line indent – Drag the small top triangle on the horizontal ruler.
- Hanging indent – Drag the lower triangle.
- Paragraph indent – Drag the rectangle beneath the triangles to shift the entire paragraph inward.
- Add & Move Tab Stops:
Click anywhere on the horizontal ruler to insert a tab stop, which helps align text neatly.

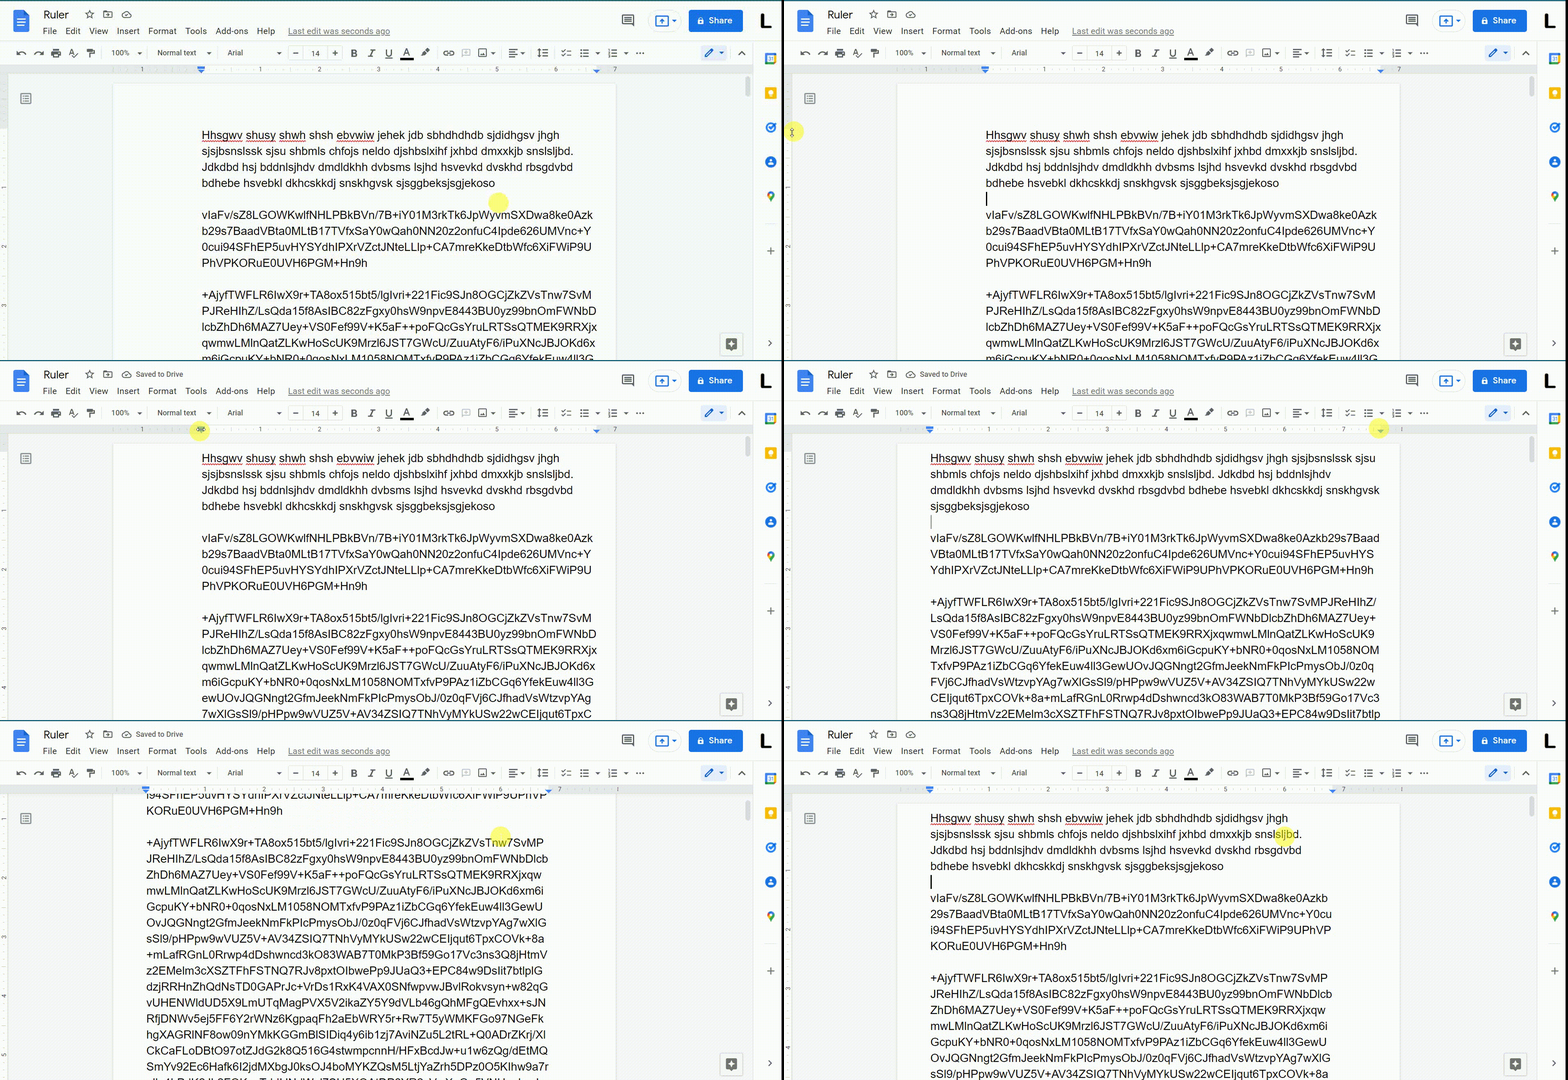
The above image is a reference to how to show ruler in Google Docs and control it for adjusting the left margin, right margin, and top margin.
Formatting With the Google Docs Ruler
The ruler can also be used for more advanced formatting:
- Text alignment: Create custom tab stops to align headings, numbers, or lists.
- Spacing control: Adjust paragraph indentation for better readability.
- Page setup: Quickly check margins without opening the Page setup dialog.
- Columns & layout: While the ruler doesn’t directly control columns, you can use indents and margins to simulate multi-column layouts.
How to Show Ruler in Google Docs Mobile App
Unfortunately, the mobile app does not support the ruler. You can only see and adjust rulers on desktop.
Alternative: Adjust margins manually on mobile by going to Page setup.
Troubleshooting the Google Docs Ruler
If something doesn’t look right, here are quick fixes:
- Ruler not showing → Go to View > Show ruler.
- Vertical ruler missing → Turn on Print layout.
- Ruler disappeared → Check your view mode, re-enable under View > Show ruler.
- Google Docs ruler not working → Refresh or reset settings.
- Need to reset ruler → Drag indent markers back to default positions.
- Units wrong (inches/cm) → Change in File > Settings > Units.
- No ruler shortcut → There is no direct shortcut; you must enable it through the menu.
- Ruler alternative → Use File > Page setup to control margins if you don’t want to use the ruler.
FAQ on Google Docs ruler
Why isn’t my ruler showing in Google Docs?
If the ruler is missing, make sure you’re in Print layout mode. Then go to View > Show ruler to enable it.
How to use the Google Docs ruler?
Use the ruler to adjust margins, set indents (first-line or hanging), and create custom tab stops. Drag the markers on the ruler to format text precisely.
How to enable the side (vertical) ruler in Google Docs?
Go to View > Show ruler and make sure Print layout is turned on. The vertical ruler will then appear on the left side of the page.
How to get the indent ruler on Google Docs?
he indent controls are part of the horizontal ruler. Use the small blue triangles and rectangle on the ruler to adjust first-line and hanging indents.
What measurement is the ruler in Google Docs?
By default, Google Docs uses inches. You can change this to centimeters in File > Settings > Units.
Can I change ruler measurements in Google Docs?
Yes. Go to File > Settings > Units and switch between inches and centimeters.
How to do a 1-inch margin on Google Docs?
Go to File > Page setup, then set all margins (top, bottom, left, right) to 1 inch.
How many cm is a 1-inch margin in Google Docs?
One inch equals 2.54 cm. If your units are set to centimeters, enter 2.54 in the margin fields under Page setup.
The Google Docs ruler is an essential formatting tool for controlling margins and indents. Whether you need the horizontal ruler for page width or the vertical ruler for margins, enabling it only takes a few clicks.